

Marketplace Apps
Google Translate
Translate and detect the language in your Agility content.
What is the Google Translate App and what are the benefits of using it?
The new Google Translate App for Agility lives on your Content Item sidebar and allows you to translate content from fields that you select
This allows you to create an item in a locale you’re familiar with, then change to a new locale and select Copy from... to copy from the previous locale.
Once you’re on the item you copied in the new locale, you can then use the Google Translate app to translate the values of those fields as needed.
Preparing Google Cloud Translation for Installation
To start, there’s a few configuration settings you’ll need to install your Google Translate App in Agility
1. To start using Google Cloud Translation, navigate to your Google Cloud Platform Console.
2. Click Create Project at the top of the page

3. Enter a Name for your project, then click Create
4. Once you’ve created a project, we’ll need to enable the API. To do this, search for the Google Cloud Translation API within your project and Enable it

5. The next step is to set up authentication with a service account so you can access the API from your website or application. To do this from your Cloud Console, select Service Accounts and then click Create Service Account at the top of the page

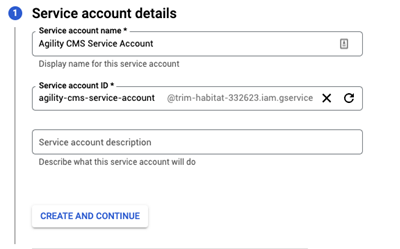
6. Choose a Name for your Service Account and then click Create and Continue
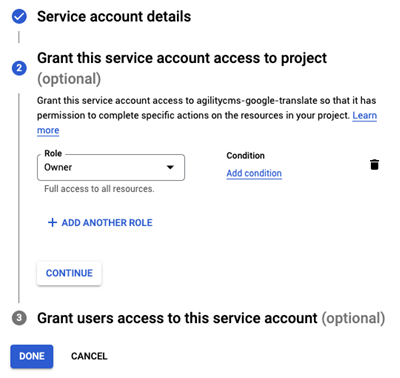
7. Next, grant your Service Account the Owner role, then click Done
8. Now we’ll need to get our service key. In the Cloud Console, click on the email address for the service account you created.

9. Click on Keys, then Create a new key.

10. Click Create, and a JSON key file will be downloaded to your computer. Save the key that gets downloaded as we’ll need this later in the tutorial!
Installing the Google Translate App
1. In Agility, navigate to the Settings of your Instance
2. Click Apps under Development in the settings menu

3. Next, click the Install button and select Google Translate from our App Marketplace

4. From the App Details pop-up page, click the Continue button found in the bottom right corner

5. Your Google Cloud Project ID will be the ID for the project we created in Step 1 of Preparing Google Cloud Translation.

7. Your Google Cloud Account Email is the Email Address inside the JSON file we downloaded in Step 10 and your Google Cloud Private Key will be the Private Key Value found in that same file.
8. Click Next to complete the Set-up and your Google Translation app should be ready to use!